Archive for the ‘Dogs’ Category

A simple guide to applying ear drops to your dog

Applying ear drops to your dog can be a daunting task for any pet owner. However, with the proper knowledge and technique, administering ear drops to your furry friend can be a simple and stress-free process.

In this guide, our very own vet, Victoria, will walk you through the proper way to apply ear drops to your dog. This includes how to properly clean the ear, the best way to administer the medication, and how to monitor your dog’s recovery. With the right approach and care, you can ensure that your dog receives the treatment they need to maintain its ear health. So, let’s get started!

Before application

In preparation for treating your dog, you should always aim to apply medicated drops to a clean ear. Watch our video above on how to clean your dog’s ears before applying any drops.

It’s important to consider that your dog may be in some pain or discomfort with its ear and might not respond well to you cleaning/treating the area. Even the calmest, gentle, and most passive dog may react with a struggle, bark, growl, or even bite. To avoid this, be cautious and patient with your dog. For particularly reactive or anxious dogs, you may find it useful to apply a muzzle before the procedure for added safety.

How to easily apply ear drops to your dog
  1. Wait 15 minutes after cleaning your dog’s ears before you begin applying the medicated ear drops.
  2. Check the medication label, including the dose and frequency of application. The instruction sheet supplied with the drops will give you advice on how to use that particular ear treatment.
  3. Make sure that your dog is in a comfortable position. If you have a small dog, positioning them on your lap is a good idea. Otherwise, laying them down on a flat surface or sitting them in front of you can make applying ear drops easier.
  4. Prepare the medication according to the instructions that accompany the bottle. You can roll the bottle in your hand to warm up the liquid beforehand so that it’s not as cold before applying it to the ear.
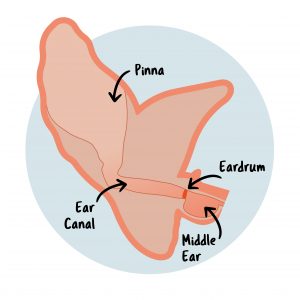
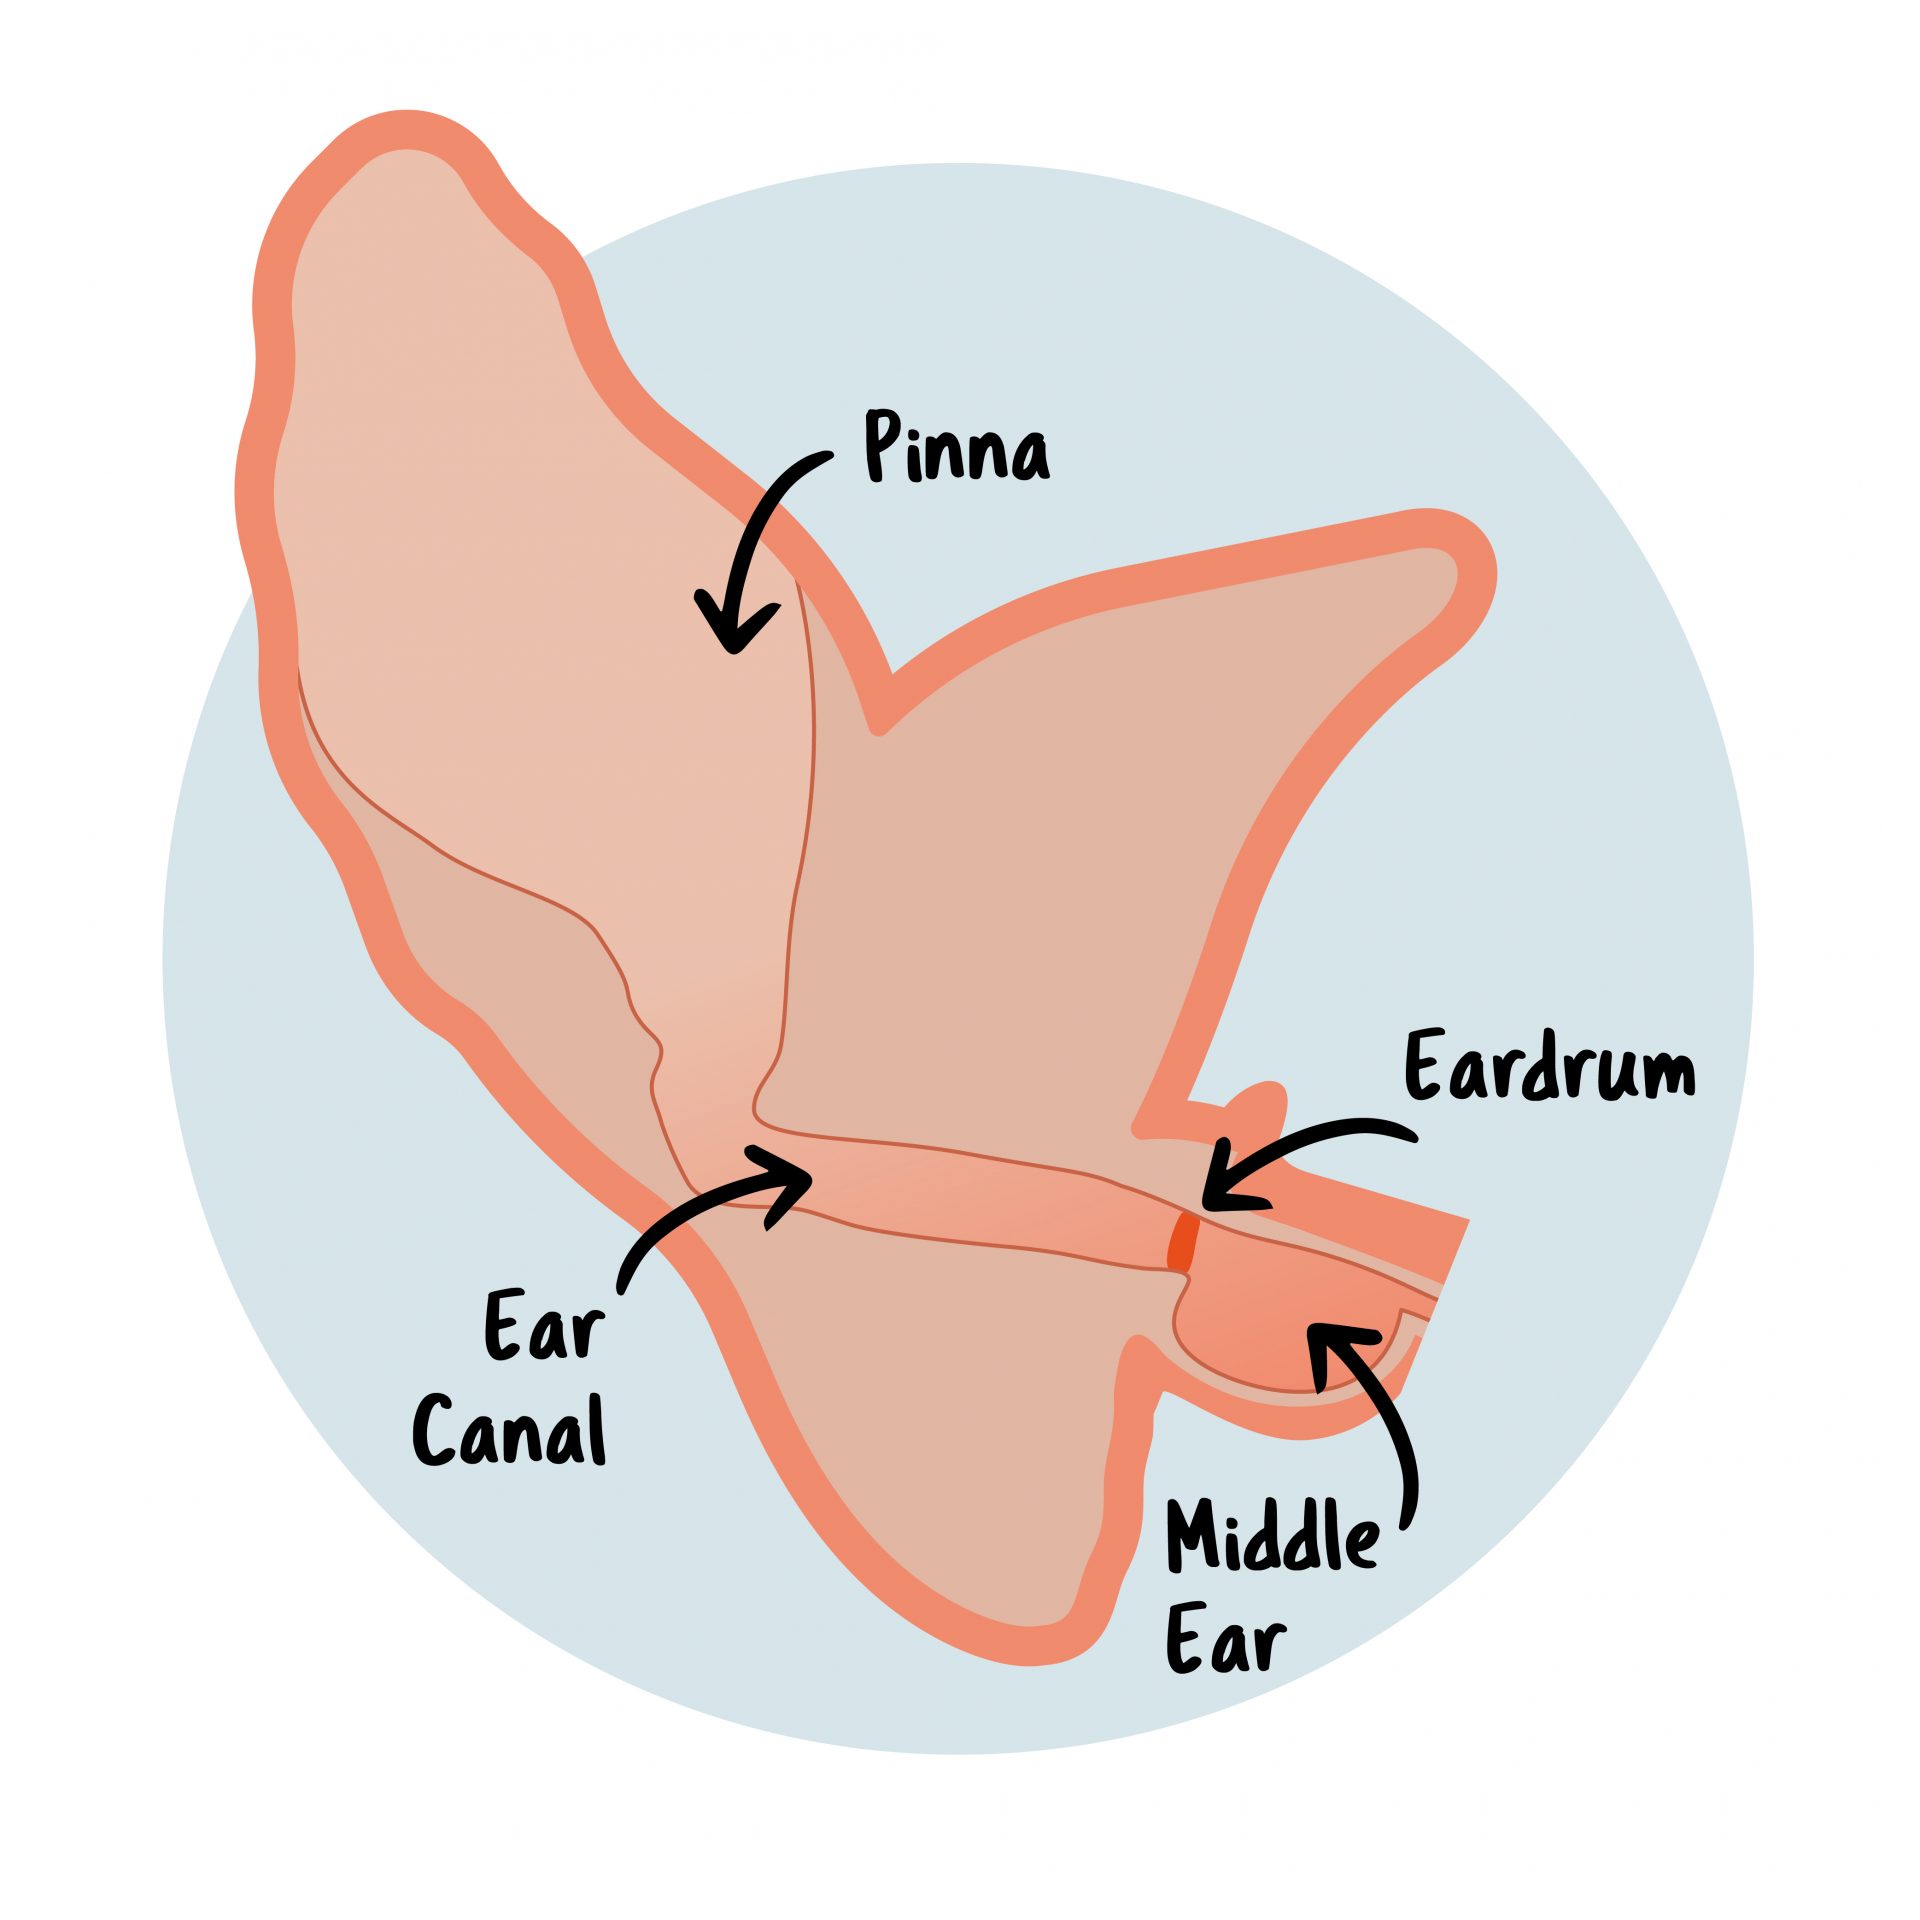
  5. Whilst holding the pointy end of the ear up, you can introduce the nozzle of the bottle/pipette to the ear canal and carefully begin to apply the number of drops stated on the label. Sometimes it can be difficult to know how much pressure to apply to form a drop, so it can be useful to practice on a piece of kitchen roll first if you are unsure.
  6. Once the drops are applied, you can gently massage around the base of the ear in a circular motion. This helps the medication reach the whole of the ear canal. If your dog is in any discomfort, they may not let you do this – be gentle and patient with them.
  7. After applying the drops, your dog will begin head shaking. Don’t worry – this is normal. Now, move on to the next ear, if it also needs treatment, and repeat!

Treating your dog’s ear infection with antibiotics

When treating your dog with antibiotic ear drops, it’s crucial to adhere to the correct dosage instructions provided to you. Avoid breaks in treatment and be sure to attend your follow-up appointments as advised. As long as you follow these guidelines, you should expect to see your furry friend back to their best in no time!

Dogs can be prone to recurrent ear infections. If your dog has had a flare-up and you have not seen a vet recently, please arrange a check-up before treating at home. Never apply old ear drops that you’ve given to your dog previously without a check-up beforehand – you need to make sure you have enough for a full course of treatment recommended by a vet.

If you are having trouble administering the treatment or you notice a head tilt
developing after using medicated drops that don’t seem to be returning to normal, please contact your local Goddard vet practice or get in touch with our Central Clinical team.

Useful tips for applying ear drops to your dog

  • Help get your dog used to ear drops by presenting them with treats and other items like toys with the treatment bottle around. Over time, your dog will begin to associate the treatment with something positive, rather than a negative outcome. You can try this several times a day to acclimate your dog to the ear drops.
  • Make an effort to message your dog’s ears as regularly as possible. This will get the dog used to you touching their ears and the areas around them, making applying treatments like ear drops more ordinary to the dog.
  • Choose a quiet environment within your home to apply the ear drops. Choosing somewhere with no distractions will help to relax your dog, especially if it can get anxious. This can make the application process much easier.

If you need further advice, book an appointment with your local Goddard vet practice, or get in touch with our Central Clinical Team at 020 8506 9944.
How Can I Tell If My Pet’s Overweight?

It can be hard, we know! However, our vets and nurses can weigh your pet and assess their body condition score (BCS) which is a method of categorising weight, ranging from 1 (very thin) to 5 (obese), with 3 being normal and healthy. You can also do some checks at home:

  • Look from above. Your pet should go in a little at the waist. If not, they may be overweight.
  • Feeling along the side of the chest, you should be able to feel the ribs. They should not be under a thick layer of fat, but they should also not be sticking out.
  • Feeling along the back of your pet, the spine and hip bones should not be sticking out but should be easy to feel.
  • Look and feel underneath your pet for any bulges.

It’s estimated that around 60% of dogs and 39-52% of cats in the UK are overweight or obese. A report by Royal Canin found 80% of dog owners stated their pet was an ideal weight, but 40% knew neither their pet’s weight nor body condition score. 74% of cat owners believed their cat was an ideal weight, but nearly two thirds (65%) acknowledged not knowing their cat’s current weight and/or body condition score.


Does it matter if my pet is overweight?

Pets who are a healthy weight are more likely to enjoy a happy and healthy life. Here are some reasons why:

  • Older pets often suffer from degenerative joint disease (arthritis). Being overweight can speed the progression of arthritis and the pain caused, ultimately reducing the quality and quantity of their life. Simple mechanics mean a dog weighing 20 kg that should weigh 15kg will place 33% more force through each limb. Even a small weight reduction can make a huge difference to their quality of life.
  • Being overweight increases the chance of diabetes in dogs and cats. Diabetes shortens life, can come with complications, and usually requires lifelong insulin injections. This poses a significant time and financial commitment for owners.
  • Obesity is not known to increase the risk of coronary heart disease as in people, but it does have adverse effects on cardiac and pulmonary function and blood pressure.
  • Operations are more risky for all pets that are overweight.
  • Rabbits naturally eat a part of their faeces known as caecotrophs, which helps recycle enzymes enabling them to digest roughage. If they are overweight, they will not be able to groom or to reach their bottom to eat these caecotrophs.
  • Obese or overweight cats are more at risk of hepatic lipidosis and lower urinary tract disease, both of which can be very serious or even fatal.

What can I do?

We can check your pet’s body condition score and weight, and perform an examination looking for other health issues, especially ones that may be weight related.

We can recommend a regime to help your pet lose weight, but it is important not to lose weight too rapidly. We aim for no more than 1-2% of their starting weight each week.

If they are only slightly overweight then feeding a bit less, or changing to a lower-calorie food may be all that’s needed. Pets needing more drastic weight loss may need a special diet, as reducing their food too much may mean they go hungry or with insufficient nutrients. A food diary for a week may highlight where your pet is getting extra calories. Each weight loss plan we suggest is individual and would involve exercise as part of the weight loss regime, but here are some general points:

  • Good pet food companies produce food for varying life-stages, as a developing pup, for example, will have different needs to an ageing dog.
  • Take the nutritional information of your current food along to your appointment and our team can assess if it’s appropriate for your pet.
  • Feeding a complete commercial pet food is the easiest way to ensure your pet gets the nutrients they need. Use feeding guidelines and weigh the food out. It seems obvious, but pets that eat too much get fat.
  • Treats and scraps on top of a complete food will unbalance the diet and most likely be turned into fat.
  • Pet lifestyle makes a difference. In the same way, an elite athlete will need more calories than an office-worker, a working greyhound or sheepdog will need more calories than a sedentary dog.
  • If considering a diet change, do it slowly to avoid upsetting the gut.

Dogs:

  • Prefer regular mealtimes. Ideally, split your dog’s daily food into two equal-sized meals, meaning your dog will be less hungry and eat more slowly. It may also help them sleep and make it less tempting to treat.

Cats:

  • Are obligate carnivores, meaning they cannot survive without meat. They cannot produce an amino acid called taurine (a protein building block) which can only be found in meat. Without it, they can develop a severe heart condition called dilated cardiomyopathy and even blindness. Their gut is not designed to digest a plant-based diet, just like a cow’s gut is not designed for a meat-based diet.
  • Prefer to graze, eating 8-16 times daily, so have food available all the time weighing out the daily quota. Most cats are very good at self-regulating but some are greedy, and with these cats, meals may be needed.
  • That drink milk often gets tummy upsets due to the lactose.

Rabbits should:

  • Eat around 50% of the time so they need at least their body size in good quality hay per day to keep boredom at bay, to keep their gut health and to keep their continually growing teeth worn down.
  • Have a handful of fresh vegetables, morning and evening. They love carrots, but as they are high in sugar, use them sparingly.
  • Have an eggcup of commercial rabbit nuggets (NOT muesli-type mix) once a day if under 3.5kg, or twice a day if larger. If fed too many nuggets, they may eat less hay and veg which are both vital for rabbit health.

How to apply spot-on flea treatments for dogs

Spot-on treatments are frequently used to treat or prevent a range of parasitic infections that may cause irritation or illness in your cat or dog or illness in you and your family. They usually need to be applied on a regular basis and it’s important to understand how to apply them accurately and safely.

Keeping up with your dog’s worm and flea treatment is important if you want to protect them from parasites.

Always check the label before applying it to your pet to make sure it’s the right one for the pet you are treating, and you are using it at the recommended frequency.

Applying the treatment doesn’t have to be complicated. Watch our step-by-step video or follow the steps below.

Top tip: Don’t forget to remove your dog’s collar before you apply the medicine, as it could get in the way of the treatment working properly.

Guide to applying spot-on flea treatment to your dog

Here at the Goddard Vet Group, we strongly advise using a prescribed monthly spot-on treatment for your dog. You should speak to your vet about the right one for your pet, and make sure that you read the label thoroughly before applying it.

  1. Once you are sure you have the right treatment for your dog, simply remove the tube from the packet, and then unscrew the top and use the end of the lid to open the pipette.
  2. Part the hair and then apply the treatment directly to the skin at the back of your pet’s neck, just above their shoulders. This is so that your pet won’t be able to rub or lick it off. There’s no need to rub it in either, as the treatment will naturally disperse across their skin.
  3. If you need to distract your dog whilst you apply the treatment, you could get some pet food paste for them to lick or ask someone to rub and scratch their ears. Making the experience a calm and positive one will make applying the treatment a lot easier for both you and your dog.
  4. Don’t bathe your pet for 4 days after application and do not allow dogs to go swimming as this may affect insects in the water and will also reduce the efficacy of the treatment.

How do spot-on treatments work?

The natural oils on your dog’s skin work to distribute the medicine around their body. The chemical pesticides then sit on the hair follicles and release continuously even after the initial application.

As well as paralysing and killing fleas within 24 hours, the treatment will also prevent new fleas from emerging in your house.

Helpful tips when applying spot-on treatment to your dog

  • For large dogs, you may have to apply to spot on in 3 places along the back – please check the label directions for the product you are using.
  • If any of the treatment transfers onto you, wash it away with soapy water. The solvent in Spot On treatment may stain or damage certain materials including leather, fabrics, plastics, and finished surfaces. Allow the application to dry before permitting contact with such surfaces.
  • Make sure you make a note of when your pet’s next treatment is next due, so you can keep them protected.
  • For further support in applying your dog’s spot-on treatment, you can watch the video above.

How can Goddard Veterinary Group help?

Many of the most effective anti-parasite products are prescription-only medicines, which means they can only be prescribed by a veterinary surgeon and will not be available in pet shops or through online subscriptions, unless under the prescription of a vet. At an annual health examination, normally at the time of vaccination, one of our vets will assess the risks of a range of parasites to your pet based on their lifestyle, and will recommend products and frequency of application, based on this risk assessment.

Additionally, if your dog has had an adverse reaction to the fleas or the treatment, and you need to see a vet, you can find your local practice here.

Helpful resources

If you would like to know more about parasites and how to reduce the risk to our dogs and family please click on the links below:


Frequently asked questions

Does it matter where you put flea treatment on a dog?

Yes, it does. You need to make sure that you apply the treatment to the skin on a part of the body your dog cannot reach. That’s why we advise the skin on the back of the neck. This is so your dog cannot lick it off and ingest it.

Can I use the same spot-on treatment for cats and dogs?

No. A dog spot-on treatment used on a cat can prove fatal for the cat. Additionally, a cat spot-on treatment for a dog will not come in a high enough dosage, as dogs are normally larger than cats. Always make sure you use the correct treatment for the correct species.

How long does it take for spot-on treatment to work?

The spot-on treatment can take up to 24 hours to completely take effect. However, it’s likely that you will start to see results within a few hours.

How often should spot-on treatment be used?

Most flea treatments will become ineffective after one month, so it’s important that you reapply it on a regular basis. Make sure you read the instructions carefully, as they hold specific information regarding the correct dosage and frequency.

Does spot-on treatment protect my dog from ticks?

Not all spot-on treatments protect against ticks. Your vet may recommend a monthly tablet to replace the monthly Spot-on, or a collar for the warmer times of the year when tick numbers are high, please ask your vet for more information on protecting your dog from ticks and the incidence in your local area, or areas you plan to travel to with your pet. To learn more about ticks, or how to remove them the PDSA has a very useful guide.

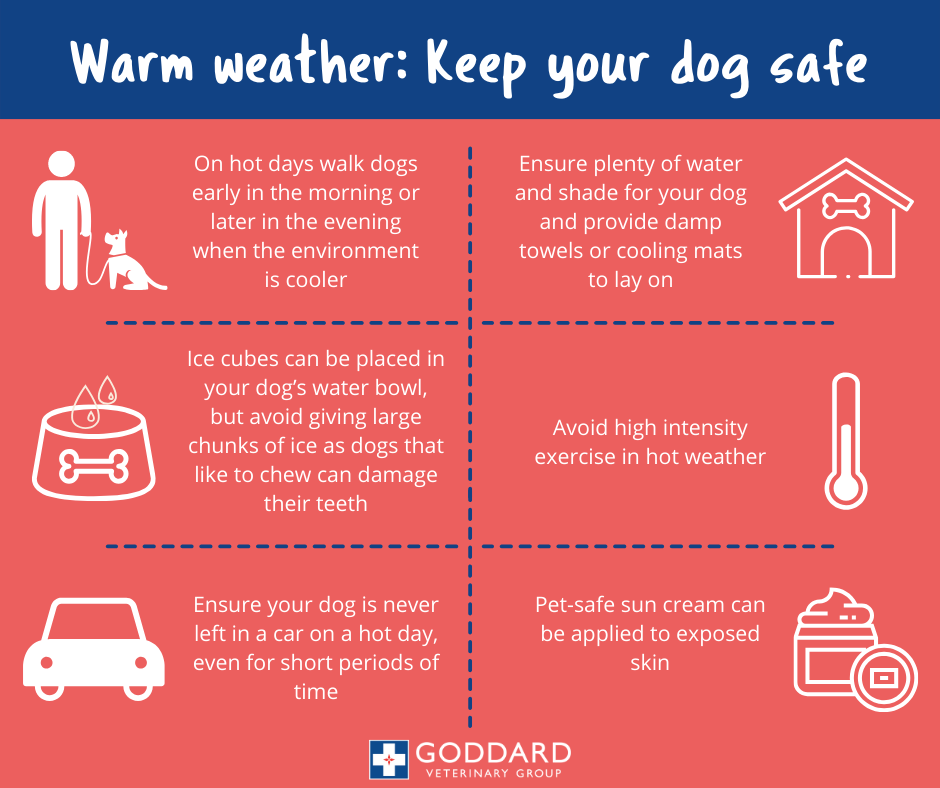
Tips on keeping your dog safe in warm weather

With the weather warming up it’s important to understand the potential dangers heat can cause our four-legged friends. Just like humans, dogs can get heatstroke when they overheat — follow these steps to keep your dog safe.

Tips on keeping your dog safe during warm weather

How to Fit an Elizabethan Collar to Your Dog

Elizabethan collars are a common sight in any veterinary practice and play an important role in your pet’s recovery following any surgical procedure. In this guide, Goddard Veterinary Groups Sam Green will show you how to fit a traditional Elizabethan collar to your pet with the help of Shelby.

Why Do Dogs Need Elizabethan Collars?

These can also be known as a buster collar or cone and are worn by dogs after surgical procedures. The aim of pets wearing these collars is to prevent the dog from licking or biting at the stitches. This is a natural reaction for your pet but can have serious and harmful consequences should they dislodge any stitches before the area has healed.

Preparing for a Collar

It may be a good idea to prepare your home environment for your dog to be cone-wearing. It will likely take your dog a few days to adjust their spatial awareness and it is common for furniture to be knocked by the cone as your dog moves through the house.

It is a good idea to move valuables and fragile objects to protect them and to limit the distress they may cause to your pet should items become broken.

Fitting the Collar  

There are a number of types of buster collars available on the market from inflatable collars to fabric, the only stipulation from the collar is that it needs to provide a clear barrier to the surgical area.

Collars also come in a variety of shapes and sizes; your Goddard Vet will ensure they provide you with the best possible fitting collar to make the transition smooth for your pet.

Traditional plastic cones are constricted into shape with the use of a stretchy bandage or fabric material. Once the cone is constructed it can be carefully slid over your pet’s head, treats can be used at this point to keep your pet calm and introduce the use of the cone with a positive experience.

Once around the neck, the collar should be secured with a bow ensuring a fit that leaves some give, our recommended fitting is that two fingers can be fit easily between the collar and your dog’s skin. This leaves ample room for a comfortable experience while it should mean the cone cannot come off. The bandaging or fabric can also be fixed to your dog’s existing collar for extra protection. 

Wearing the Collar

Food and Drink

It is important to make considerations around the home for your pet while they are wearing the collar. One of the most important is their ability to access food and drink. Navigating the cone around bowls and to a place they can consume food and water may be challenging and placing their food at different heights or in different bowls/trays or plates may be required. 

Positive Reinforcement

Using positivity around the cone and making sure your pet is as comfortable as possible is an important factor in their ability to settle into their time wearing it. The use of treats and positive affection is encouraged to improve the experience of your pet throughout.

Frequently Asked Questions

How Long Does My Pet Need a Buster Collar?

The collar should remain on your dog until the stitches have dissolved or have been taken out by your vet. During this time, it is important to keep your pet’s activity levels to a minimum to aid their recovery and limit the chance of damage to the surgical area.

Should I Take an Elizabethan Collar Off at Night?

Your dog’s collar should remain on for the duration of the time it is required, including at night. This removes the temptation of your dog becoming irritated by the area during the night and biting or licking the wound. The cone shape will not cause any discomfort to your pet’s ability to sleep.