Managing your dog’s anxiety when visiting the Vet
A visit to the veterinary clinic can be quite stressful for some dogs and we aim to help you to reduce this fear by using a number of measures to reduce the risk of your dog becoming anxious.
Once a dog becomes highly anxious or fearful, there is a greatly increased risk of your dog biting either you, a member of your family or a member of your veterinary team. Due to the potentially serious nature of dog bite wounds leading to serious injuries or infections, please follow this guidance to reduce this risk.
Reading a dog’s body language helps us to know when your dog might be inclined to reach the top level of anxiety or fear, which can result in biting. If treatment is not urgent, we can rebook an appointment to allow time to plan a different approach.
Routine or non-urgent examinations
- When booking an appointment, please let us know if your dog has a fear of the veterinary clinic or of other dogs.
- Request an appointment at a quiet time of the day when the waiting area is not full, such as the first appointment in the afternoon and when you and your dog are less likely to encounter other waiting patients.
- You may wish to wait outside the clinic until it is time for your appointment – please let us know that you are waiting.
- We can offer an extended consultations to allow time for the examination to proceed more slowly and with particular attention to your dog’s individual anxieties. Please ask at reception for the price of an extended consultation.
- Use natural pheromones to reduce anxiety. These are calming molecules that activate calming centres in the brain – your branch may recommend Adaptil® Collars or Sprays, or Pet Remedy®.
- Consider nutritional supplements, which, when used over a period of time, may help to reduce anxiety and help with learning new behaviours. Our team can recommend particular supplements or diets.
- In some cases, it may be advisable for your vet to prescribe anti-anxiety medications that can be given a couple of hours before the visit to the practice. This will reduce their anxiety in the short term to help with short procedures such as a clinical examination, vaccination, taking blood, clipping nails or examining ears. Your vet can recommend an appropriate medication for your dog.
- Our veterinary team can also refer you to an animal behaviourist to help reduce your dog’s fears and anxieties.
If an examination is needed and there is a risk of injury, then please always follow the directions of our veterinary team to keep you, your dog and our team safe.
Some dogs are actually easier to examine when you, or your family, are not in the room as they feel they need to protect you. The veterinary team may ask you to wait in reception while they examine or treat your dog and then discuss their findings with you.
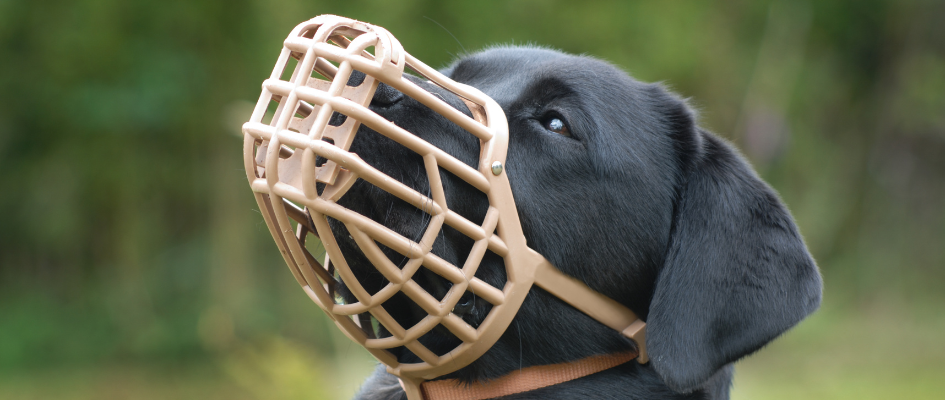
Using a muzzle
In some cases, our team will recommend that your dog is muzzled on visits to the practice, in order to be able to examine and treat your dog safely. Muzzling doesn’t just keep you and our team safe; it also improves treatment outcomes for your dog.
The thought of a dog muzzle may might make you feel a little anxious. However, many dogs will feel calmer in a muzzle, especially if you can train them to wear one at home and if they have positive associations, such as receiving special treats, when wearing one.
Muzzling a dog is not just for dogs that are fearful, but they are also common for Greyhounds due to their high prey drive and for dogs that are prone to scavenging which can have potentially serious consequences for their health.
Choosing a muzzle
There are lots of types of muzzles. Choose a muzzle that your dog can eat, drink and pant through. It needs to fit comfortably without obscuring their vision or digging into their face and needs to be secure and as comfortable as possible. If it’s rubbing, you can try wrapping a non-irritant fabric around the inside of the nosepiece.
What if I need to use a muzzle before my dog is ready, such as for a veterinary examination?
If you’ve started your training and you need to fully muzzle your dog for any reason, such as a visit to the vets, use a completely different style of muzzle. Your practice will have a range of muzzles for use in the practice. Using a different muzzle for this short time will minimise disruption to training with your dog’s own muzzle.
Click here to visit Dog’s Trust step-by-step guide on muzzle training
For further helpful information on dog training and behaviour, visit www.dogstrust.org.uk/dog-advice/training