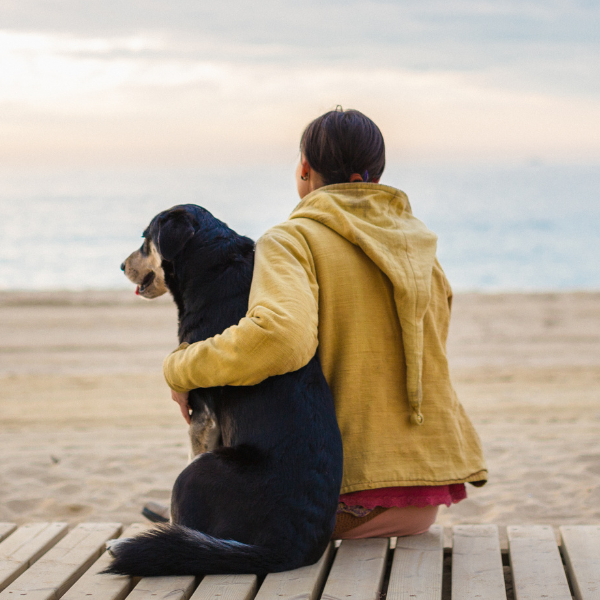
As we move towards Bonfire Night, Diwali and New Year’s Eve, our love for fireworks has created an entire season of celebrations. While it’s exciting to have multiple opportunities to revel in the festivities, we must keep in mind that not everyone shares our enthusiasm. Our beloved pets, for instance, may not enjoy the noise and commotion caused by fireworks. To ensure the safety of your cats, dogs, and other pets during this firework season, we’ve compiled a list of ten helpful tips in this blog.
TIP 1: DESENSITISE YOUR DOGS AND CATS
If your pet is afraid of the loud noises, start desensitisation therapy as early as you can. Try downloading firework sound effects from Dogs Trust and play them very, very quietly. Reward your pet for staying calm, and over weeks or even months, gradually increase the volume so they get used to the sound.
TIP 2: MAKE SURE THEY ARE MICROCHIPPED
Panicking pets tend to run, but they’re not so fussy where they run to! If they DO escape and are microchipped you can be sure you’ll be reunited again.
TIP 3: USE PHEROMONES
There are pheromone products available for cats and dogs such as Feliway and Adaptil. They are very effective at reducing stress and anxiety levels. Start using them at least 2-3 weeks before fireworks season starts if possible.
TIP 4: TRY OUT SOME CALMERS
There are a wide range of herbal and nutritional calmers on the market; some of which we stock and can recommend. Although the evidence for Zylkene isn’t conclusive, we think it really can help settle animals down if given over a prolonged period!
TIP 5: BUILD A NICE NEST
Your pets need to be kept safe and secure, with a suitable nest or den to hide in. This is especially important for dogs and cats, but also applies to rabbits and small furries kept in open cages or hutches. Make sure they can hide themselves away when the displays start!
TIP 6: KEEP YOUR ANIMALS SAFELY INDOORS
It may be a little tricky but make sure your cat and dog are safely inside. Not only will it stop them escaping (and then potentially coming to harm), but it will also muffle any scary sounds and frightening lights.
TIP 7: LIGHTPROOF AND SOUNDPROOF HUTCHES, CAGES AND AVIARIES
If possible, rabbits and other small pets in cages or hutches should also be brought inside — or at least, away from sight and sound of the fireworks. For example, a large hutch can usually be moved into a garage or shed. For cage birds, the aviary isn’t usually movable, but the bright flashes can panic birds into a smother. As a result, we recommend carefully covering the aviary (while leaving lots of air-holes!) to minimise any risk.
TIP 8: KEEP TO A NORMAL ROUTINE
Many pets are very sensitive to changes in routine and timing and can put them on edge. So as much as possible, keep everything the same. You really don’t need any extra stress — and neither do they!
TIP 9: DON’T REWARD FEARFUL BEHAVIOUR
Of course, if your dog is afraid, your cat is scared, or your rabbit is terrified, it’s only natural to try and comfort them. However, you need to be careful. Excessive fuss and treats can reinforce the fearful behaviour — as they learn this is what they need to do to get your attention! As a rule of thumb, make a moderate fuss of them if they come to you, but don’t go to them, or dramatically change the way you react. Remember, pets can pick up on our stress levels as well as vice versa, so it can spiral out of control!
TIP 10: COME AND TALK TO US
If your pet is really, really stressed and you’re worried they’ll hurt themselves — come and talk to us. Not only can we give you personalised and tailored advice, but our vets can, if necessary, prescribe anti-anxiety medications to relieve short-term stress, fear and panic.
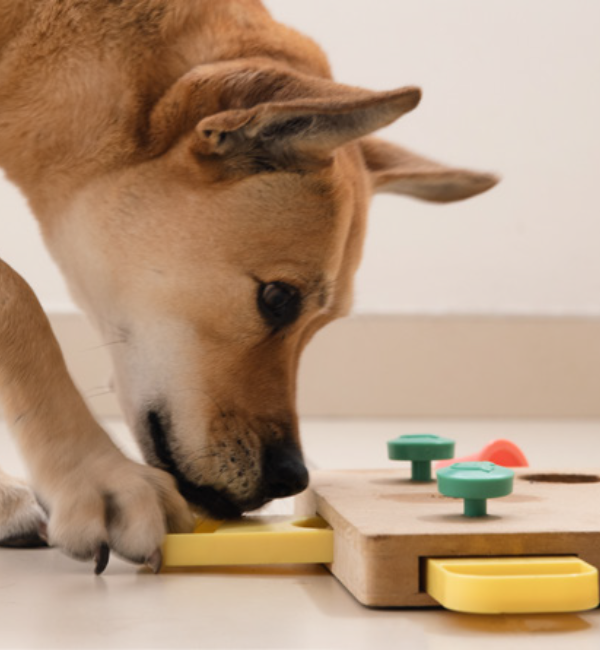
The recovery period after surgery can be challenging for both you and your pet. While rest is vital for physical healing, it’s equally important to support your pet’s mental wellbeing. Pets who are used to walks, play, and regular activity can become frustrated or anxious when their exercise is restricted.
This guide offers vet-approved activities to help your dog or cat stay calm, stimulated, and happy during recovery — helping you both through the healing process with confidence.
Why mental wellbeing matters after surgery
During recovery, pets often experience changes in their routine. Reduced exercise, limited space, and extra rest can lead to boredom, stress, or frustration.
Mental stimulation can help:
Reduce anxiety and restlessness
Prevent destructive or unwanted behaviours
Strengthen your bond with your pet
Provide satisfaction that’s often more tiring than physical exercise
If your pet is finding recovery particularly stressful, please contact your vet. We can advise on additional strategies — including whether short-term medication may be appropriate to help your pet relax and heal comfortably.
Choosing the right treats for recovery
The type of treats you use will depend on your pet’s dietary needs, calorie intake, and preferences. For some dogs, their regular kibble will be enough for enrichment games. Others may need higher-value treats such as:
Small pieces of cooked chicken
Liver paste (only if your dog is not on a low fat diet)
Natural yoghurt
Commercial dog treats
If your pet is on a recovery diet, these foods can also be used in enrichment activities — just make sure any extras fit within their daily calorie limit to avoid weight gain. Always check with your vet if you’re unsure.
Vet-approved enrichment ideas for recovery
Feeding and activity toys
Instead of feeding from a bowl, make mealtimes more engaging. When selecting activity toys please make sure they are appropriate for your dog’s size and strength. Avoid anything which your dog may potentially swallow and cause an obstruction. These toys encourage natural problem-solving and help calm your pet through mental stimulation.
If you dog is recovering from dental or oral surgery, please check with the veterinary team when it is appropriate to start using activity toys or hard chews.
Stuffable feeding toys
How to: Fill a toy with your pet’s food or treats.
Try with: Kibble, recovery food, chicken, or yoghurt.
Top tip: Mix kibble with yoghurt or wet food and freeze to increase difficulty and duration.
Frozen cups
How to: Fill a safe plastic cup with kibble or treats, top with water or low-fat yoghurt, and freeze.
Why it helps: Licking frozen food is soothing and keeps pets occupied longer.
Interactive or treat-dispensing toys
How to: Great for older dogs or those with paw injuries. Fill the toy and let your pet roll or nose it to release treats.
Try with: Kibble, recovery food, or small treats.
Lick mats
How to: Spread wet food, yoghurt, or liver paste over the surface.
Top tip: Freeze for extra challenge — licking is naturally calming and rewarding.
Snuffle mats, towels, and cardboard boxes
Encourage your pet to use their nose — a mentally tiring and satisfying skill.
Snuffle mats
How to: Hide kibble or treats within the mat for your dog to sniff out.
DIY option: Use an old towel or cardboard box filled with fabric strips.
Towels and boxes
How to: Roll treats inside a towel or hide them in a box filled with paper or cardboard tubes.
Top tip: Increase difficulty by tying the towel loosely or closing the box flaps.
Scatter or “seek and find” games
Let your dog put their nose to work!
How to: Scatter kibble or treats on the floor or in the garden.
Safety note: Avoid stairs, heights, or toxic plants such as oak leaves.
Top tip: Teach the command “find it” for extra mental stimulation.
Puzzle feeders and homemade brain games
Puzzle feeders
How to: Fill as per the manufacturer’s instructions.
Try with: Kibble, chicken, yoghurt, or wet recovery food.
Muffin tin game
How to: Place treats in each cup and cover with tennis balls or other safe obstacles.
Top tip: If your dog gets too excited by tennis balls, use quieter alternatives.
Plastic bottle puzzle
How to: Remove the lid and seal, fill with kibble or treats, and let your dog work out how to get them out.
Gentle training and new cues to try
The recovery period is a great time to revisit basic training or introduce new mental challenges that don’t require much movement.
Teach scent work
Place a scented fabric (e.g., cloves) in a cup. When your dog sniffs it, reward them.
Once they understand the game, introduce new scents with different commands.
Teach “watch me” or “look at me”
Encourage your dog to make eye contact before giving a treat.
Builds focus and strengthens your bond.
Teach “touch”
Reward your dog for touching your hand with their nose. This can evolve into useful training cues.
Follow your hand
Use a treat in your hand to guide gentle movement and reward them for following calmly.
Supporting your pet’s recovery journey
Mental stimulation during recovery helps your pet stay calm, content, and connected with you. These simple activities make rest days more rewarding and promote a smoother healing process.
If you have any questions about post-operative recovery, mental wellbeing, or which enrichment ideas are safest for your pet, please contact your veterinary team. We’re always happy to help guide you through your pet’s recovery.
Rusty, a nine-year-old Labrador cross Cocker Spaniel, has been receiving treatment for a rare skin condition as part of our support of the charity London Retired Police Dogs Trust (LRPD).
Rusty served for six years as a search dog with the Metropolitan Police, sniffing out drugs, firearms and money, and many of his finds helped lead to convictions. Due to being such a trusted member of the force, he was part of the team tasked to search the Trooping the Colour route to ensure it was safe for the Queen’s procession to take place.
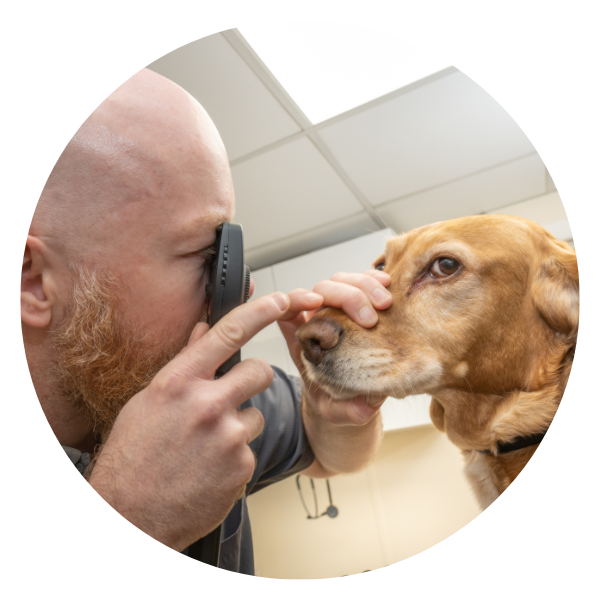
Rusty suffers from an ongoing condition that affects the skin around his eye and he has been receiving treatment at our South Woodford Practice.
All of our 44 veterinary practices and three veterinary hospitals in and around Greater London, support retired service dogs with discounted veterinary treatment through the LRPD. The charity funds veterinary care for dogs that have served with the Metropolitan Police, City of London Police and London Fire Brigade.
Rusty has been treated by Adam Thoms, a vet at our South Woodford branch in Woodford Road who has a certificate in small animal ophthalmology.
He said: “Rusty came in to see us because he had a recurring sore patch in the corner of one eye, which was causing him a bit of discomfort. We carried out tests, which revealed he suffers from a chronic inflammatory skin disease. Rusty’s case is quite unusual because while Labrador’s sometimes have this condition around their nose, but I’ve not seen it around the eye before.
“Rusty’s condition is being managed with medication and he’s responded very well to treatment and is feeling much more comfortable.
“He is a lovely, calm and friendly dog who has done an incredible service for people living in London, so being able to help him has been very rewarding.”
Since standing down from official duties, Rusty lives in the Loughton area with his former handler Duncan who has also now retired from the force.
Duncan said: “Rusty was a brilliant working dog and recovered firearms from locations that had already been thoroughly searched. He also uncovered large quantities of cash and drugs and was able to locate single bullet casings from busy streets that would otherwise have been like looking for a needle in a haystack. The power of his nose never ceased to amaze me.
“He’s received a very high standard of care from Goddard Veterinary Group and I’m grateful to the practice and LRPD for helping keep Rusty healthy. When police officers retire they get a pension, but service dogs don’t receive any financial support and many have pre-existing conditions that have been a direct result from being in the line of duty. The cost of care falls to the handlers like me, so to receive support with his veterinary bills makes a massive difference.”
Emma Dignam is a serving police officer who was a co-founder of LRPD in 2019, achieving full charity status in 2020, said: “We are delighted to be working with Goddard Veterinary Group and hope that through our partnership we can help many more service dogs like Rusty enjoy a happy and healthy retirement.”
If you would like to find out more about the charity, visit: www.lrpd.uk
Pet Eye Health Awareness Week
As well as supporting retired service dogs like Rusty, we’re also marking Pet Eye Health Awareness Week by raising awareness of common eye problems in pets.
👀 Can you recognise the seven common signs of poor eye health?
Asymmetry
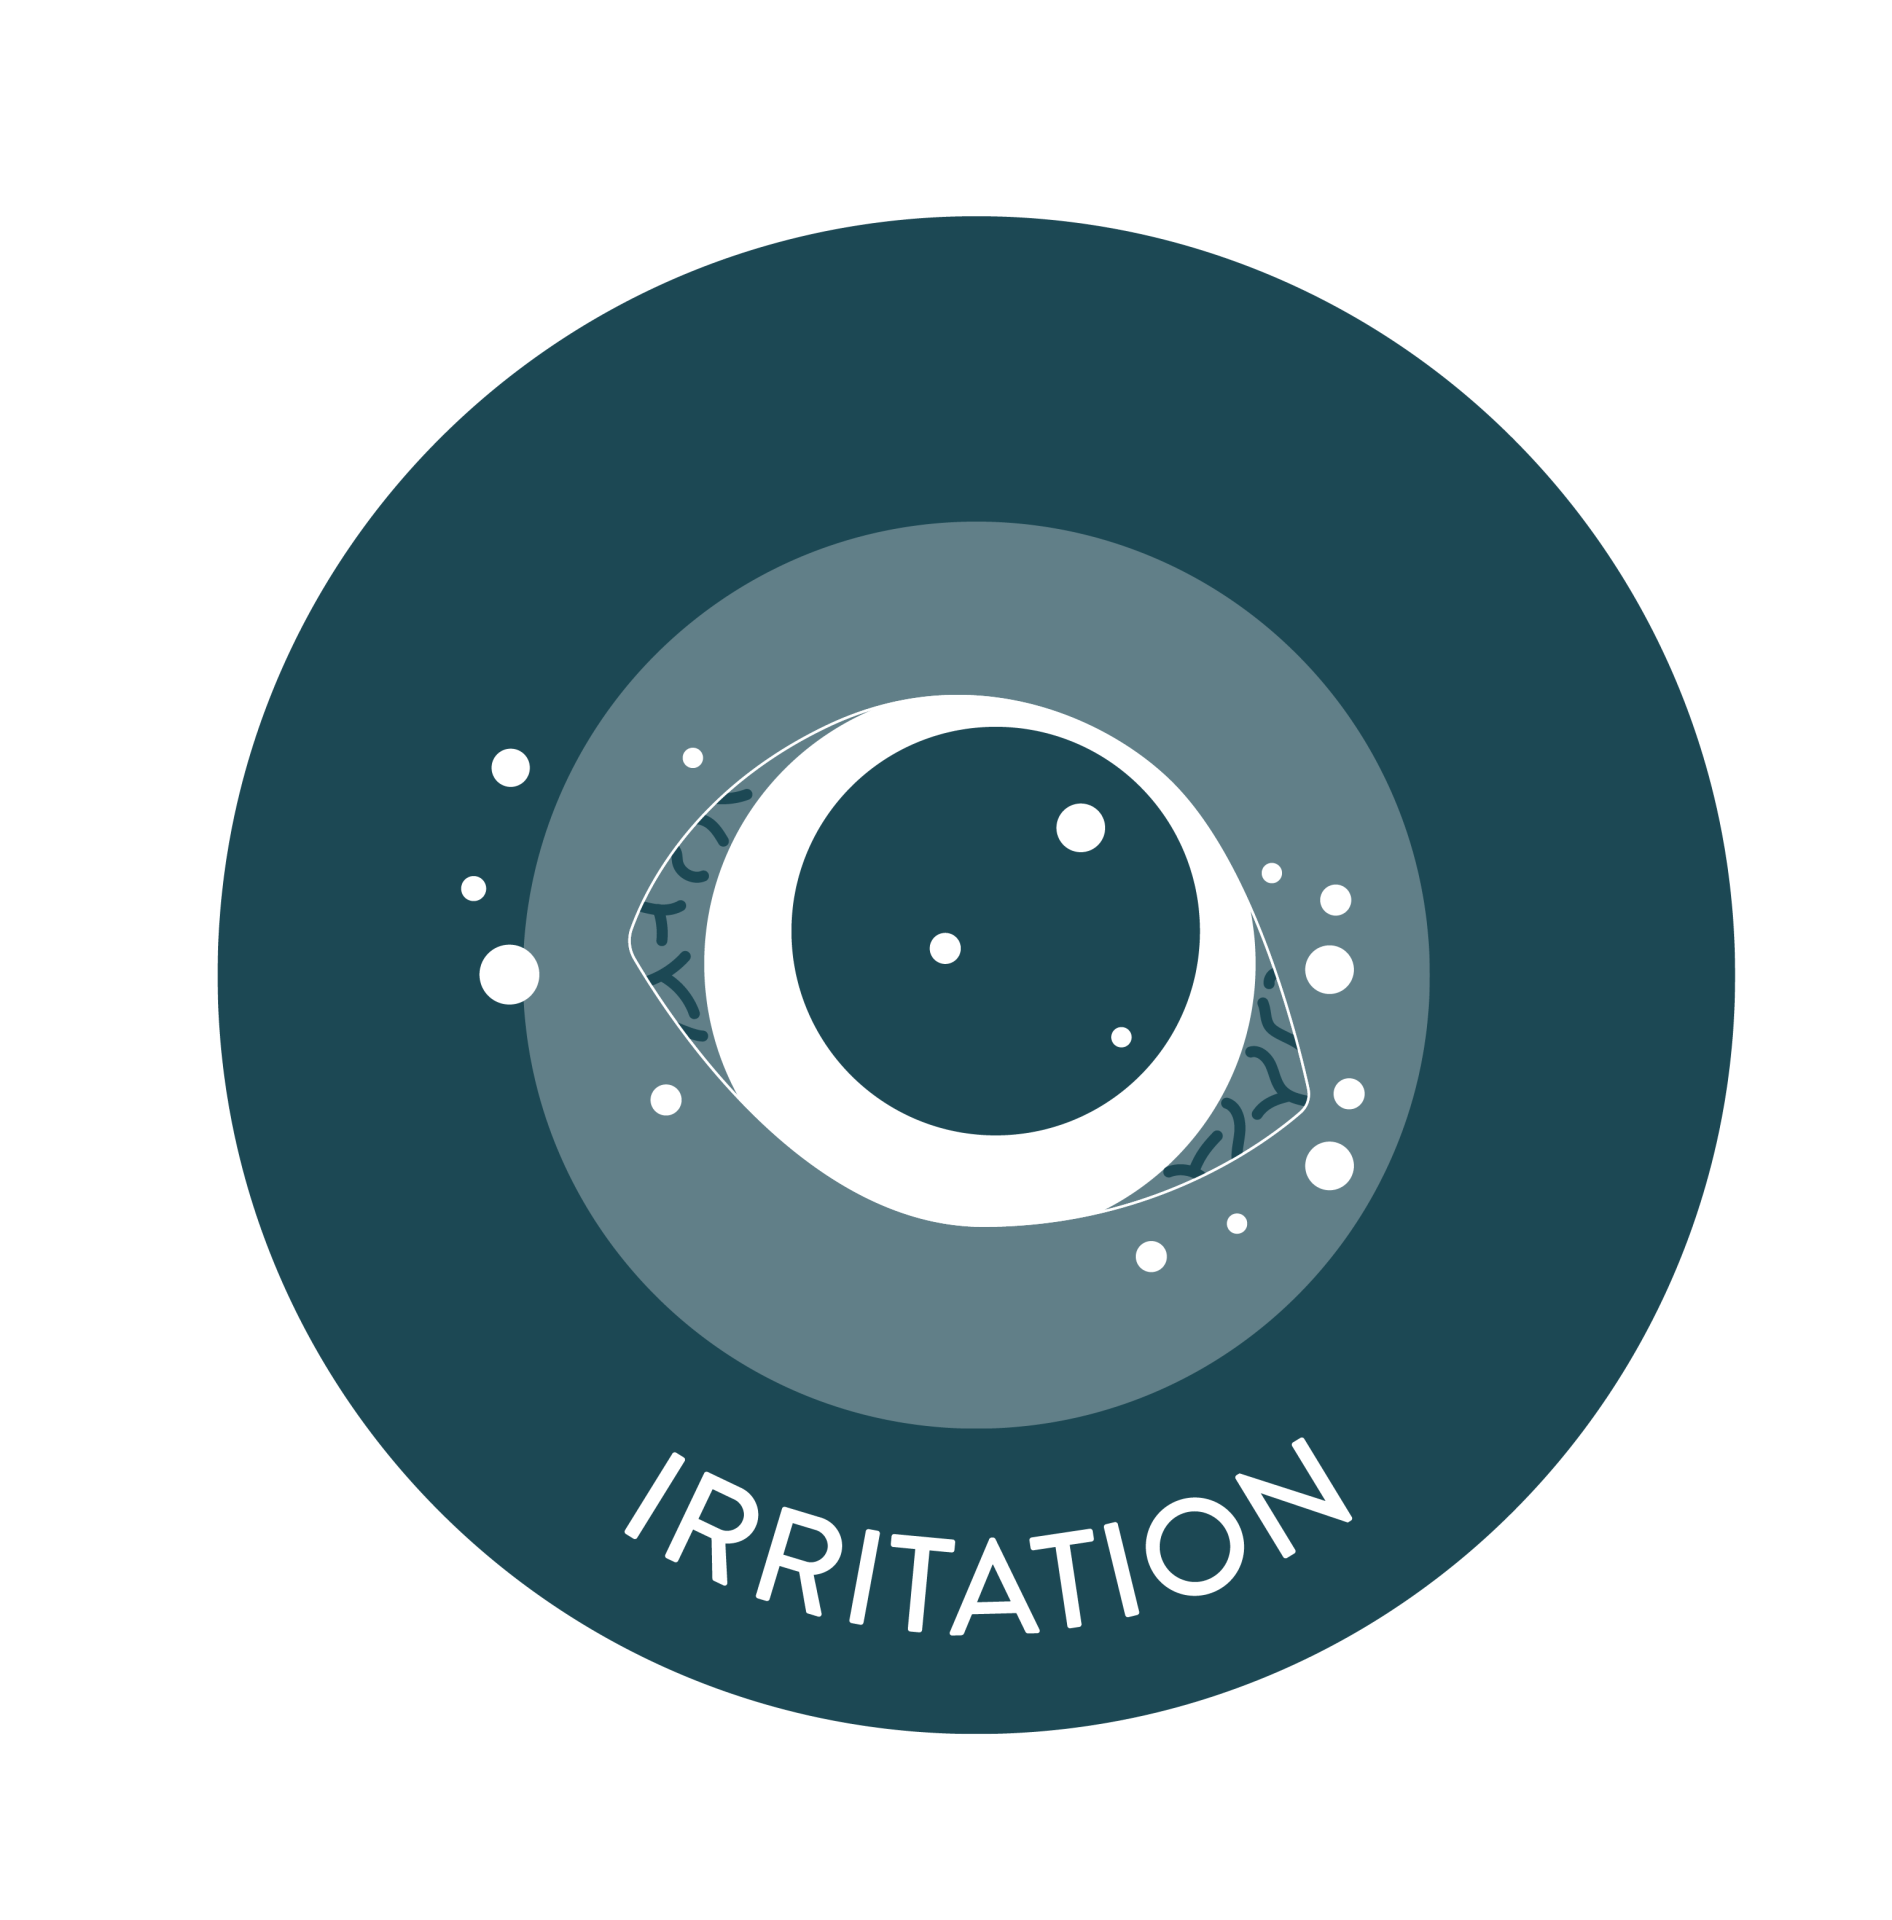
Irritation
Blindness
Tear staining
Redness
Dull, cloudy, or colour change
Runny or sticky eye
If you notice any of these symptoms in your pet, it’s important to book a check-up with your vet—early diagnosis and treatment can make all the difference.
Can you recognise the seven common signs of poor pet eye health? We are taking part in National Pet Eye Health Awareness Week (15-21 September) in partnership with Dômes Pharmawho have shared the most important things to look out for.
1. Asymmetry
Careful observation of the way your pet looks and acts and what is classed as ‘normal’ for them is the first critical step for responsible pet care. Regarding eye health, any perceived changes in your pet’s eyes can be a good indication of whether or not a trip to your vet is warranted. Do both eyes look like each other, are the face and head symmetrical when comparing right to left?
Useful Observations:
Do they both look shiny and clear, not dull, cloudy, or dry?
Are the pupils the same size and shape?
Is one eye squinting?
Is one eye runny with watery or sticky discharge?
Is the colour the same? Does one look red? Has the iris suddenly changed colour?
Eyes are extremely sensitive and easily irritated – did you know that the cornea has around 20-40 times more nerve endings than the tooth root? And most of us know how painful toothache is…
If you believe that your pet is suffering from eye irritation you should contact your vet for advice as irritation can be a sign of eye pain or itchiness.
Symptoms that may suggest that your pet is suffering from eye irritation:
Pawing/rubbing at their eye/s
Redness
Squinting or excessive blinking
Excessive tear staining
Sticky or runny discharge
Light sensitivity
Swollen skin around the eyes
Dullness or cloudiness of the eye
Different pupil sizes
Some common reasons which may cause eye irritation in your pet:
Allergies
Conjunctivitis
Foreign object in the eye
Eyelid Abnormalities
Trauma
Corneal scratches/ulcers
Irritants – smoke, shampoo, etc
Dry eye (poor tear film)
Eye problems can be very painful and go from bad to worse very quickly so don’t delay in seeking advice and treatment from your vet!
3. Blindness
Like us, pets often experience gradually failing eyesight as they approach their senior years and due to compensation using their other, superior, senses like smell and hearing, gradual sight loss may not be easily noticed by pet owners.
However, there are many other conditions that can cause your pet to go blind relatively suddenly at any age, so it is important to be vigilant of sudden changes or symptoms.
Symptoms of acute eyesight loss you may notice are:
Changes in the appearance of the eye
Confusion/disorientation
Clumsiness – bumping into things
Easily startled or nervous
Slow and cautious movement
Getting lost outside
Unable to find toys, food dishes, water, etc.
Not wanting to go out at night
Conditions causing blindness are serious and need urgent treatment if there is any remaining chance to prevent total, permanent vision loss. Blindness can also be a result of many systemic diseases which can be damaging to other organ systems so it is extra important to get your pet checked and treated.
Conditions that can cause blindness:
Tumours in the eye
Eye injuries
Glaucoma
Brain disease – Aneurism, Stroke, Seizures, Tumours, or Infection
General Disease – e.g. diabetes, hyperthyroidism
Cataracts – more common in Miniature Poodles, Miniature Schnauzers, Cocker Spaniels, Golden Retrievers, Boston Terriers, and Siberian Huskies
Corneal disease
Dry eye
Retinal Disease
Inflammation inside the eye
4. Tear Staining
Tear stains are those reddish-brown marks that can appear on the fur around your pet’s eyes. These stains can be unsightly and noticeable, especially on pale fur.
Dog and cat tears naturally contain high amounts of porphyrins – these are iron-containing compounds derived from red blood cell breakdown in the body. When tears sit on the skin the porphyrin staining will intensify in the presence of light.
Not only that, when tears sit on the skin around the eye, they make it damp which favours local bacterial growth – some bacteria can produce their own porphyrins, therefore, contributing to tear staining.
Tear staining is more likely to occur in certain breeds where tears find their way onto the face more easily, rather than draining normally down the tear ducts. For instance, this may be due to the shape of the face, abnormalities of the tear ducts, or small hairs around the corners of the eye that wick tears onto the face.
In most cases tear staining is largely a cosmetic problem and your pet will lead an otherwise normal life, however, some patients with tear stains may have underlying eye problems which means they overproduce tears due to ocular irritation. These tears can then spill over onto the face resulting in tear staining. It is important to ensure underlying reasons for tear staining have been ruled out by a vet as, if ignored, the underlying problem may progress and be harder to treat.
5. Redness
Your pet’s eyes are as sensitive as your own and are just as susceptible to irritation, allergies, injury, and disease. One of the earliest signs of many eye problems is a red eye. If your pet’s eyes appear visibly red or swollen get them checked ASAP by your vet as some causes of a red eye are not only painful but can lead to permanent blindness if left untreated (such as glaucoma).
Common causes of redness:
Conjunctivitis
Allergies or irritants
Foreign object in the eye
Dry Eye
Injury
Uveitis (inflammation inside the eye)
Corneal Ulcers
Glaucoma
Cherry Eye
6. Dull, Cloudy, or Colour Change
Healthy eyes should be bright, clear, and shiny — if your pet’s eye suddenly looks cloudy or opaque this is a sure sign of an eye problem that needs to be examined by a vet!
Most often cloudiness is noticed in the cornea (the clear window at the front of the eye) or the lens- vision may be affected to varying degrees depending on the underlying cause.
Conditions most likely to cause cloudy or opaque eyes:
Cataracts
Uveitis- inflammation inside the eye
Pannus- autoimmune inflammation in the cornea, German Shepherds are predisposed
Injury or damage to the eye/s
Corneal ulcers or scratches
Dry Eye
Glaucoma
Nuclear Sclerosis is considered a normal ageing change in older pets where the lens takes on a cloudy or blueish haze – it doesn’t affect vision but can often be confused with cataracts at first glance. Your vet can easily distinguish between the two conditions by doing an eye exam.
7. Runny or Sticky Eye
Eye discharge is a common problem in pets. Some types are completely normal, while others may be associated with potentially serious health concerns. In order to determine when you need to take your pet to the vet, you’ll need to understand the various types of eye discharge and what each may mean.
5 most common types of eye discharge:
A little ‘gunk’ or crustiness – generally made out of dried tears, oil, mucus, dead cells, dust, etc. Typically, clear or a slightly reddish-brown colour that accumulates at the inside corners of the eyes. Most evident in the morning and is perfectly normal, with the amount produced each day being relatively constant. It should be easily removed with a damp cloth or eye cleansing solution made for pets. The eyes shouldn’t be red and shouldn’t exhibit any signs of discomfort.
Watery Eyes – Excessive eye watering (AKA epiphora) is associated with many different conditions that can range from being relatively minor to more serious. Below are some of the common causes of watery eyes in pets:
Allergies
Irritants
Foreign body in the eye
Anatomical abnormalities (e.g. rolled in eyelids)
Blocked tear ducts
Corneal wounds
Glaucoma (increased eye pressure)
Your pet may have simply received an eyeful of pollen or dust, and the increased tearing is working to solve the problem. If eyes continue to water or your pet develops red, painful eyes or other types of eye discharge, make an appointment with your vet.
Reddish-Brown Tear Stains – many pets, especially those with light-coloured fur, develop a reddish-brown discolouration to the fur near the inner corner of their eyes. This occurs because tears contain a pigment called porphyrin that turns reddish-brown with prolonged exposure to air. In most cases tear staining is cosmetic and can be removed with eye cleansers however sometimes it may be due to an underlying disease causing excess tearing so it is advisable to get tear stains checked by a vet.
White-Grey Mucus – This can be a sign of Dry Eye (AKA keratoconjunctivitis sicca), a condition where the tear film becomes inadequate. A normal tear film is vital for good eye health so the body tries to compensate by making more mucus to try and lubricate the eyes. Left untreated Dry Eye can result in severe discomfort and potentially even blindness.
Yellow or Green Eye Discharge – pets whose eyes produce yellow or green discharge often have conjunctivitis or an eye infection.
If you have any concerns or questions, book a routine appointment online with your local Goddard vet.
Pet travel to and from the European Union, Northern Ireland and Approved Countries
Following Brexit, an EU Passport that was issued in Great Britain is no longer valid for travel to the EU an Animal Health Certificate (AHC) is instead required for travel to the EU, or a PTD for travel to Northern Ireland. Please ensure that you read the full details at gov.uk before travelling.
Travelling to Northern Ireland with your Pet
You no longer need a AHC to travel to Northern Ireland but will need to complete a Northern Ireland pet travel document (PTD) to take your dog, cat or ferret from Great Britain (England, Scotland or Wales) to Northern Ireland.
Your pet must be microchipped.
They do not need rabies vaccinations or tapeworm treatment if you have a PTD.
These rules also apply to assistance dogs.
If you’re exporting dogs, cats, or ferrets for commercial purposes, such as a change of ownership, check the rules for commercial pet travel on Northern Ireland Government website.
Preparing to travel to the European Union (EU) with your pet
It is essential to prepare well ahead of your journey. Before your dog, cat or ferret can travel from Great Britain (GB) to the EU or Northern Ireland you’ll need to take the following steps.
You must have your dog, cat, or ferret microchipped.
Have your dog, cat, or ferret vaccinated against Rabies. Your pet must be at least 12 weeks old before it can be vaccinated.
Wait at least 21 days after the primary vaccination before seeing an Official Veterinarian (OV) for completing the AHC and no more than 10 days before travel to the EU.
You must either travel with your pet or within 5 days of your pet travelling. The person travelling with your pet must attend the AHC appointment.
What is an Animal Health Certificate (AHC)?
The Animal Health Certificate is a 12-page document that must be completed and certified by an Official Veterinarian (OV) who has completed additional animal export training, and who has been approved by the UK Government for this purpose. The certificate takes considerable time to complete, and accuracy is important. You will need to provide supporting evidence for completion of the document:
A record of the date of microchipping
Rabies vaccination records
Evidence of your journey, showing that you are either travelling with your pet, or within 5 days of your pet.
The person travelling with your pet will need to sign a declaration at the certification appointment that the movement of the pets is for non-commercial reasons.
At Goddard Vet Group, we have several OVs available across our London practices that can help you with your pet travel needs so please check that one is available when you need to travel by booking well in advance of your travel date. To assist with this process, and to ensure you are fully informed about the documentation you will be required to provide, please complete our online AHC Client Information Form that will be emailed to you when on request of an appointment for an AHC. The completed form should be submitted at least 14 days before your intended date of travel and once reviewed by our official veterinarian, we will call to confirm your appointment.
The Animal Health Certificate will be valid for:
10 days after the date of issue for entry into the EU
Onward travel within the EU for 4 months after the date of issue
Re-entry to GB for 4 months after the date of issue
Only one trip
If you are travelling with more than 5 pets
All pets must be over 6 months of age, and must be attending or training for a competition, show or sporting event.
Written documentation of the age of the pets, and records of attendance at these events must be provided.
Dogs travelling to Finland, the Republic of Ireland, Norway or Malta
Dogs must receive treatment against tapeworm (Echinococcus multilocularis) between 1 to 5 days before arriving in any of these countries.
Tapeworm treatment must be entered by the Official Veterinary (OV) on the AHC following treatment or in an EU-issued Pet Passport. In practice, therefore, AHCs to these countries will normally be issued within 1-5 days before arrival at your destination.
Arriving in the EU
Pet owners travelling with pets must travel on approved routes and will need to enter through a designated Travellers’ Point of Entry (TPE). You may be required to present the pet’s original AHC along with evidence of your pet’s:
Microchip
Rabies vaccination history
Tapeworm treatment (if required).
Repeat trips to the EU
A new AHC will be required for each trip and a rabies vaccination will need to be up-to-date or, if not, revaccination will be required followed by a 21-day wait before travel.
Returning to Great Britain
There will be no change to the current health preparations for pets entering Great Britain from 1 January 2021. Pet owners must have one of the following documents when returning to Great Britain from the EU:
An EU pet passport (issued in the EU), or a pet passport from a Part 1 listed third country
The AHC issued in GB used to travel to the EU – which you can use up to 4 months after it was issued
A UK pet health certificate (for travel into GB only).
This documentation is not required if entering Great Britain from:
Northern Ireland
The Channel Islands
The Isle of Man
The Republic of Ireland.
Check the routes before you travel. Owners must travel using approved routes and their pet’s documents and microchip will be checked when entering Great Britain.
Owners of assistance dogs returning from the EU do not have to travel on approved routes. You must notify the point of entry in advance that you are travelling with an assistance dog to ensure the appropriate checks are done. Owners do not have to travel on an approved route if they travel to Great Britain from:
Other UK countries
The Channel Islands
The Isle of Man
The Republic of Ireland.
Travelling home from countries not free from tapeworm (Echinococcus multilocularis)
You will need to take your dog to a vet for approved tapeworm treatment and must do this no less than 24 hours and no more than 120 hours (5 days) before entering Great Britain. This requirement has not changed since 1 January 2021. The treatment must:
Be approved for use in the country where the treatment is applied.
Contain praziquantel or an equivalent proven to be effective against tapeworm (Echinococcus multilocularis).
Tapeworm treatment of dogs is not required prior to re-entry to Great Britain if travelling directly to the UK from Finland, Republic of Ireland, NI, Norway or Malta.
Health and welfare of your pet abroad
You should consider that if you take your pet abroad it may be exposed to several diseases that we do not have in this country e.g. some diseases transmitted by ticks or biting flies, and parasites such as heartworm and tapeworm. The tapeworm treatment given under the pet travel rules is purely to prevent the introduction of those parasites into the UK. However, it is vitally important that your pet is protected against these other diseases while abroad. In addition to routine vaccination and normal flea and worm control, the following need to be considered and preventive treatment given. You may find further information regarding the risks and recommended preventive measure measures for the region you are travelling in by checking the European Travelling Pets Advice website.
Leishmaniasis
Caused by an organism that is spread between animals by sandflies. Affected animals may lose weight, develop skin lesions and swollen lymph nodes, become lame, and have recurring fevers. A vaccine is available against Leishmaniasis. This should be planned well in advance of travel. Sandfly repellents are also available from your veterinary practice.
Babesiosis
A parasitic disease of red blood cells is spread by ticks. Signs of disease may include fever, loss of appetite, the passage of red/brown urine, anaemia, weakness, and death.
Ehrlichiosis
A disease that is also transmitted by ticks and infects red blood cells. Clinical signs vary but include fever, loss of appetite, and anaemia.
Dirofilariasis (Heartworm Disease)
Is transmitted by mosquitoes with the development of adult worms which live in the heart and blood vessels. The signs of the disease include coughing, breathlessness and can lead to death.
Tapeworms
Echinococcus can produce serious disease in humans and so it is important to protect your pet and thereby, yourself and your family. As well as the tapeworm treatment administered by a Veterinary Surgeon before returning to the UK, we recommend using tapeworm treatment every month your pet is in the EU, 1-5 days before returning (which must be given and certified by a Veterinary Surgeon), and then again, 1 month after returning.
Brucella Canis and Rabies – transmittable to people via bites or scratches
Both of these infectious diseases can be transmitted to your dog, or to you from direct contact with infected dogs, and in the case of Rabies, both dogs and foxes. They are most commonly observed in Eastern European countries.
While your dog will be vaccinated against rabies, please contact a veterinary practice if your dog is bitten while abroad. If you are bitten or scratched by a stray dog please immediately wash any wounds or scratches and contact a medical facility as soon as possible in the country in which you were bitten.
Protect your pet with regular preventative treatment
We have seen several cases of some of the diseases listed above, especially Babesiosis and Leishmaniasis in pets that have become infected while abroad. We would therefore recommend that your pet receives regular preventive treatment to protect against the following whilst travelling abroad in:
Ticks (protect against Babesia and Ehrlichia infection)
Heartworm
Tapeworm
Sandflies and mosquitoes (protect against Leishmania and Heartworm infection).
Your local Goddard Vet will be able to advise you on the best protective treatments to use depending on the area that you intend to travel to.