Archive for the ‘Cats’ Category

How to apply spot-on flea treatments for cats

Spot-on treatments for cats can be used to treat or prevent a wide range of parasites that can cause irritation, illness, and infection in your pet or in you and your family. Spot-on treatments are usually applied once a month and it’s important to understand how to apply them accurately and safely. Keeping up with your cat’s worm and flea treatment is important if you want to protect them from parasites.

Always check the label before applying it to your pet to make sure it’s the right one for the pet you are treating and using it at the recommended frequency.

Applying the treatment doesn’t have to be complicated. Watch our step-by-step video or follow the steps below.

Top tip: Don’t forget to remove your cat’s collar before you apply the medicine, as it could get in the way of the treatment working correctly.

Guide to applying spot-on flea treatment to your cat

Here at the Goddard Vet Group, we strongly advise using a prescribed monthly spot-on treatment for your cat. You should speak to your vet about the right one for your pet, and make sure that you read the label thoroughly before applying it.

  1. Simply remove the tube from the packet, and then unscrew the top and use the end of the lid to open the pipette.
  2. Part the hair and then apply the treatment directly to the skin at the back of your pet’s neck, just above their shoulders. This is so that your pet won’t be able to rub or lick it off. There’s no need to rub it in either, as the treatment will naturally disperse across their skin.
  3. Most cats will be fine to have their treatment applied whilst resting on their bed or sitting on your lap. However, if not, you can ask someone to gently hold your cat and distract them with some treats whilst you apply the treatment. Using a food paste that they enjoy and can lick while you apply the treatment will help to make it a stress-free experience.

Helpful tips when applying spot-on treatment to your cat

  • If any of the treatment transfers onto you, wash it away with soapy water. The solvent in spot-on treatment may stain or damage certain materials including leather, fabrics, plastics, and finished surfaces. Allow the application to dry before permitting contact with such surfaces.
  • Make sure you make a note of when your pet’s next treatment is next due, so you can keep them protected.
  • For further support in applying your cat’s spot-on treatment, you can watch the video above.
How can Goddard Veterinary Group help?

If you have any questions or concerns about what kind of spot-on treatment your cat should be on, then our vets will be more than happy to advise you. Your pet needs to be protected from a wide range of parasites and we know that it can be overwhelming when choosing which parasite remedies are right for your pet. We can help you by reviewing the risks and offering advice based on your pet’s lifestyle.

Additionally, if your cat has had an adverse reaction to the fleas or the treatment, and you need to see a vet, you can find your local practice here.

Helpful resources

If you would like to know more about the parasites and how to reduce the risk to our cats and family please click on the links below:


Frequently asked questions

Does it matter where you put flea treatment on a cat?

It is important that when applying spot-on treatments for fleas that you apply the treatment to a place where your cat can not reach it. The back of your cat’s neck is the most advised place, this ensures that it cannot be licked off and ingested.

Can I use the same spot-on treatment for cats and dogs?

No. A dog’s spot-on treatment used on a cat can prove fatal for the cat. Additionally, a cat spot-on treatment for a dog will not come in a high enough dosage, as dogs are normally larger than cats. Always make sure you use the correct treatment for the correct species.

How long does it take for spot-on treatment to work?

Spot-on treatment can take up to 24 hours to begin taking full effect and killing the fleas. During this time it is normal to see the fleas on your pet and to notice them jumping about.

How often should spot-on treatment be used?

Most spot-on treatments need to be administered once per month. With central-heating fleas can still be active in the winter months, so it is important that a regular cycle of treatments is used throughout the year to ensure the protection remains consistent. Before applying the treatment it is important to read the instructions to apply the correct dosage for your cat and at the correct frequency for the brand used.

Does spot-on treatment protect my cat from ticks?

Not all spot-on treatments protect against ticks. Your vet may recommend a monthly tablet to replace the monthly spot-on, or a collar for the warmer times of the year when tick numbers are high, please ask your vet for more information on protecting your cat from ticks and the incidence in your local area, or areas you plan to travel to with your pet. To learn more about ticks, or how to remove them the PDSA has a very useful guide.
How to Fit an Elizabethan Collar to Your Cat

Buster collars are a common sight to see with pets leaving a veterinary practice and are used most often following a surgical procedure. In this guide, Goddard’s very own Sam Green will demonstrate how to assemble and fit a buster collar to a cat with the assistance of Doda.

What is a Buster Collar?

A Buster Collar, also known as an Elizabethan Collar, is a protective shield worn around the neck of a pet to prevent biting or licking at a surgical wound that could cause the removal of stitches or infections. Buster Collars are most commonly plastic but can be bought as inflatables for additional comfort.

Why Does My Cat Need A Buster Collar?

Following any surgical procedure, your cat’s natural reaction will be to attempt to lick and clean the wound left behind. This is an instinctive reaction, but one that can be harmful to the recovery of your pet. By licking or nibbling at the area it is possible to dislodge stitches added by the vet or to cause infections in the wound. Both of these will cause negative reactions and delay the healing process from the procedure.

Assembling A Buster Collar

After a surgical procedure, you will be given a buster collar for your pet. Collars are available in a range of sizes with smaller ones often an ideal size for a cat. To assemble the collar you will need a stretchy bandage or length of fabric, alternatively, you can connect the collar to your cat’s quick-release collar.

When the collar is assembled it can be gently slid over your cat’s head and into place. This can be a good time to offer a treat as a way to reinforce this as a positive experience. Ensure the collar is fitted appropriately for your cat but that it also allows free movement and is not too tight that it may be excessively uncomfortable.

Bring the bandage to the back of your cat’s neck and tie a loose bow to fix the collar into place Just like a collar, it is recommended that at least a two-finger gap is left to make it comfortable for your pet.

How Long Should the Collar Stay On?

Buster Collars should remain on until all stitches have dissolved or been removed by a vet. During this period your cat should remain indoors to avoid unnecessary activity that lengthens the recovery period or re-opens the wound.

If you are unsure if the time is right to take off your pet’s buster collar, contact your local Goddard Veterinary Practice to get the advice of a veterinarian.

Your kitten’s first vaccination appointment

We’re delighted to welcome you and your kitten ahead of their first vaccination appointment and health check. We thought it would be useful to give you an idea as to what to expect at your appointment so you can prepare any questions you would like to raise with your vet in advance. If you have any questions before then though, you are welcome to phone us in practice and we’d be delighted to help.


Bringing your kitten to your appointment

Please bring your kitten in a clean cat carrier that your kitten is familiar with an absorbent lining and some bedding that smells of your kitten and home. For hints and tricks to making travel and vet visits more comfortable for your cat, see our blog below.


What will happen at the appointment?

1. Full health assessment

After welcoming you both, your vet will first ask you some questions and make full clinical examination of your kitten. 

They will ask you details about their eating and toilet habits as well as how active they are in order to better understand how your kitten developing and to help identify any areas of concern.

2. Vaccinating your kitten

If your kitten has not yet had its first vaccine…

  • Your vet will administer your kitten’s first vaccination.  This will protect against four important diseases: Feline Calicivirus, Feline Herpes Virus, Feline Panleucopenia Virus and Feline Leukaemia Virus.
  • Your kitten will be given two vaccine doses, the second of which will be three to four weeks after the first. Kittens will need to be at least 12 weeks old at the time of the second vaccine.
  • Due to the high cat population density in London, we recommend that kittens are kept indoors until they are old enough to be neutered (around four months of age) and until four weeks after their second vaccination when they will have maximum protection.

If your kitten has already had its first vaccine elsewhere…

    • We use Nobivac® vaccinations.  Please let us know before your appointment, by emailing us a copy of the vaccination certificate if your kitten has had its first vaccination elsewhere.  The brand of vaccination and the timing of that vaccination will influence when we need to see you, and what vaccinations your kitten will need.


Yearly boosters

    • A yearly booster will be needed to ensure protection against these diseases is maintained. We’ll remind you via email or text when your kitten’s annual booster jab and health check is due.


Will it hurt?

    • In the majority of cases kittens will not even notice the injection.  Sometimes it may cause a sting or discomfort at the time of injection that will make your kitten wriggle or cry out.  You may notice a small swelling at the site of injection and this can occasionally be hard or painful to touch for 3 days.

3. Healthcare Advice

At your appointment your vet or nurse will talk with you about a number of common healthcare- related considerations to help you make the best choices for your kitten. These will include:


Parasite Control

  • If your kitten has already had flea or worming treatment given by the breeder or yourself, please bring details of what product was used and when it was given, to your appointment. 
  • Kittens are very susceptible to the effects of worm and flea infections and adult cats also require regular worm and flea control to prevent serious illness, poor health and to keep your family safe. 
  • At the appointment your vet will assess your kitten’s health, weight and lifestyle and will recommend a regular program of both treatment and prevention.
  • The most effective parasite treatments are often only available by veterinary prescription. We don’t recommend over-the-counter products or online products bought without a veterinary assessment and weight check.

Neutering

  • We advise neutering of kittens from 4 months of age, and once your kitten is fully vaccinated.

  • Queens (the girls): In females, the procedure is called Spaying. This involves a general anaesthetic and a clipped patch surrounding a small incision (perhaps 1cm long) on one flank through which the ovaries and uterus are removed.
  • Toms (the boys): For tomcats, the procedure is called castration, and involves surgical removal of both testicles. Once under anaesthetic, the vet will pluck the hair from his scrotum (“ball sack”) and then make two small incisions in it, one on each side.

Microchipping

  • From June 2024, it is now a legal requirement in England that cats over 20 weeks of age are microchipped.

  • A microchip is a tiny glass capsule, about the size of a grain of rice, which is filled with electronic components giving a unique 15-digit number. Giving a pet a microchip is a relatively simple procedure. If your pet wanders or gets injured, and is bought to a vet clinic or charity, then we scan the chip and contact you through the details you have registered on the chip database.

  • We advise microchipping of kittens at either time of vaccination or at time of neutering if before 20 weeks of age. If your kitten has already been microchipped by your breeder, please make sure you contact the microchip company to have the registered contact details changed to your details.


Pet Health Plan

  • Keeping your kitten happy and healthy is a top priority, and our Pet Health Plan makes routine preventative care simple and affordable. For just £21 per month, the plan includes your kitten’s primary vaccination course, vet-prescribed flea and worm treatments, regular health checks and more.
  • You’ll also benefit from savings on services such as neutering and microchipping, helping you spread the cost of essential care while giving your kitten the best possible start in life.

Insurance

  • We recommend that you consider pet insurance to cover unexpected sickness or injury which can be costly. (This is different to preventative healthcare which is not insurance).
  • If you’ve not already organised pet insurance, ask us at your appointment about setting up an initial 4 weeks of free cover once the vet has assessed your kitten to be fit and healthy and free from pre-existing conditions.
  • Should you wish, we can pass your details to a pet insurance provider to provide your kitten with an immediate temporary four-week insurance policy.
  • The company can provide information about its policies which you are under no obligation to take up. Activating this free insurance can help cover the cost of unexpected veterinary treatment during this period and give you peace of mind whilst you decide which, if any, policy or insurance company is best for you.

Nutrition

  • We would advise a good quality complete kitten food such as the Royal Canin range which is stocked in our practice.  If your breeder has given you food, and you would like to change to a recommended food, then you should do so gradually, over the course of about seven days.  Be careful with the treats that you are giving as some may not be suitable for kittens and can cause diarrhoea.
  • Do not give your kitten human food.
  • We recommend feeding a mix of wet and dry food.  Cats should eat little and often. 
  • It is important that they always have access to clean, fresh water and they prefer water to not be located next to their food so leave bowls of water around the house for easy access.

Understanding your cat and everyday care

  • Thanks to the hard work of committed cat lovers and feline specialists around the world we now have a much better understanding of cats, their behaviour and their environmental and healthcare needs than we did even just a few years ago.
  • Icatcare.org is an excellent source of information to you get you started on providing a safe and happy home for your new kitten and we are our proud that all Goddard Veterinary Group practices are members its sister organisation the International Society of Feline Medicine. 
  • Whilst your kitten is young it is the best time to get him/ her used to being handled. Dental problems or problems with their coat commonly affect cats later in life, so starting care early on can certainly be beneficial.
  • The following link gives more information on how to look after your cat’s everyday health, including tooth brushing.

Stress-Free Vet Visits For Your Cat

Taking your cat to the vets can be a stressful experience for both you and your pet, but for some cats even just visiting us for a routine appointment can be an ordeal. If your cat is also ill or painful then it can be additionally stressful for them, but there are steps you can take to make it easier for them to cope. With a bit of planning ahead, a visit to our vets can be a much less traumatic experience for your cat.

Preparing for a vet visit

Cats like routine and can easily become stressed in new situations, especially if they have previously had a negative experience. However, there are things you can do to prepare your cat for a visit to our practice that will give them a more positive experience and reduce any future stress:

Familiarising your cat with their carrier

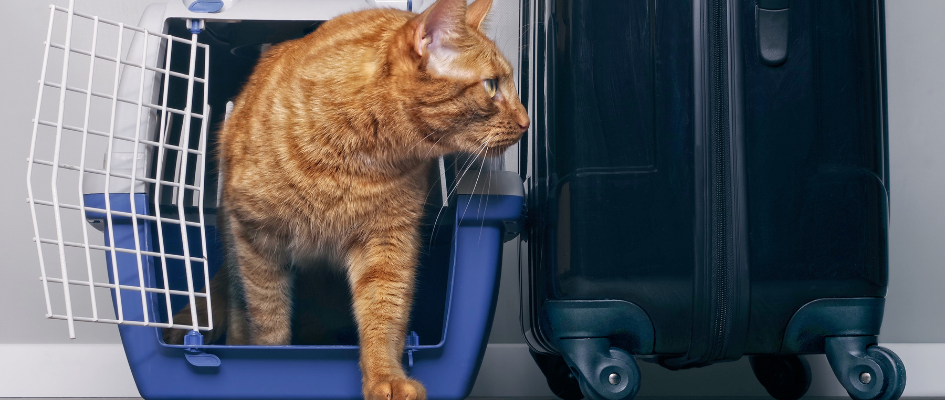
A pet carrier is essential for safely transporting your cat and should always be used when bringing your cat to us. However, if the only time your cat sees their carrier is when they are going somewhere stressful, then they will quickly learn to associate the carrier with negative experiences. It can then start to be difficult to get them to go inside.

To reduce any negative association that your cat may have with their carrier, you need to use the carrier as part of their daily routine, so they will become familiar with it. This means that the carrier needs to become part of your cat’s normal furniture. You may need to feed your cat inside the carrier, or let them use the carrier to sleep in, allowing them to become comfortable using it on a daily basis. It can take time to adjust to the carrier being part of everyday life but eventually they will become more comfortable using it, resulting in them being calmer when they need to use the carrier for travelling.

What to put in the carrier?

To make the carrier more appealing and familiar for your cat, there are items you can add to it. By lining the carrier with your cat’s favourite blanket or item of bedding, you can ensure that they have a familiar scent inside the carrier. Some cats are also comforted by their owner’s scent, so you could add an item of your clothing to give your cat extra reassurance. If your cat is being hospitalised with us then you can also bring along one of your cat’s blankets that we can add to their bed to make their stay more comfortable.

Feliway

Cats can communicate using pheromones which are released when your cat is happy and content. Feliway is a synthetic pheromone that mimics the happy and content signal a cat will produce. This means it can be a useful product to use that will help settle your cat and keep them relaxed in a variety of situations. Before using the carrier it can be useful to spray the carrier and any bedding or covers with Feliway, 15 minutes before you need it. This can help keep your cat calm while in the carrier, during the journey, and while at our vets. You can also repeat the use of Feliway in the carrier if you are picking your cat up from us after a hospital stay. Using it in your home once you get back from your visit, to help your cat settle after their journey, can also be helpful. One of our team would be happy to discuss with you the use of Feliway and how it may be helpful for your cat.

Travelling to the vets

Now that your cat is familiar with their carrier and is ready for their visit to see us, it is time to think about how you can make your cat’s journey to the vets as stress free as possible. Cars are scary for a cat, with the noise and motion being upsetting for many individuals, but there are ways you can make the journey more comfortable for them.

Car journeys

Once your cat is inside the carrier, you should try to make them feel as secure as you can. Cats can become stressed by travelling and unfamiliar environments, so you can reduce this stress by covering the carrier up with a blanket or towel. Once in the car, the carrier should be secured so that it does not move around. Using a seat belt is a good way of keeping the carrier safe in your car. Cats also prefer the carrier to be kept level, so using extra towels to keep the carrier in a suitable position will also help keep your cat relaxed. If it is a hot day then make sure that the car is at a comfortable temperature for your pet. Be careful that they are not left inside the car by themselves for any length of time, as the car can heat up to dangerous levels very quickly. Remember to keep your cat secure inside the carrier throughout the journey and not to let them out inside the car. A scared cat may try and escape which can be dangerous for them in an unfamiliar environment.

At the vets…

The waiting room

The waiting room can be a very stressful place for your cat with all the different scents present and other pets that may be there. It is important to remember that meeting a dog will be very unsettling for your cat, so you should try to avoid any encounters with dogs if you can, particularly if your cat is nervous. Once in our waiting room try to sit separately from any dogs, and let one of our team know if this is not possible so we can help you.

Continue to keep the carrier covered over so that your cat still feels secure. Cats usually feel safer at a higher level so avoid placing the carrier on the floor and instead use one of the chairs to put the carrier on, to keep your cat more comfortable. For your cat’s safety keep them inside the carrier at all times while in the waiting room, where they will feel secure.

The consulting room

Once inside the consulting room, if the doors are secure, then it can be useful to let your cat out to explore, allowing them to adjust to their new surroundings. By giving your cat time to walk around the floor is a good way to let them settle. If your cat is visiting us for a procedure, such as a nail clip or blood test, then our vet may ask a nurse to help hold your cat to make the procedure as safe and comfortable for your cat as possible. If your cat is particularly nervous then one of our vets would be happy to give you advice on how to keep them calm.


We understand that visiting our vets can be scary and stressful for your cat, so we try to make the experience as comfortable and stress-free as possible. If you have any questions about how you can help keep your cat calm and settled during their visit, then one of our team will be happy to help you.

Pet Travel to Europe from 2021

Pet travel to and from the European Union and Approved Countries

The government has confirmed the post-Brexit rules for travelling to the European Union (EU) and Northern Ireland (NI) with pet cats, ferrets, or dogs, including assistance dogs. Great Britain (England, Scotland, and Wales), including the Channel Islands and Isle of Man, have become a Part 2 listed third country under the EU Pet Travel Scheme, effective from 1 January 2021.

This means that an EU Passport that was issued in Great Britain is no longer valid for travel to the EU or Northern Ireland and an Animal Health Certificate (AHC) is instead required.

Preparing to travel to the European Union (EU) or Northern Ireland (NI) with your pet

It is essential to prepare well ahead of your journey. Before your dog, cat or ferret can travel from Great Britain (GB) to the EU or Northern Ireland you’ll need to take the following steps.

  1. You must have your dog, cat, or ferret microchipped.
  2. Have your dog, cat, or ferret vaccinated against Rabies. Your pet must be at least 12 weeks old before it can be vaccinated.
  3. Wait at least 21 days after the primary vaccination before seeing an Official Veterinarian (OV) for completing the AHC and no more than 10 days before travel to the EU.
  4. You must either travel with your pet or within 5 days of your pet travelling.

What is an Animal Health Certificate (AHC)?

The Animal Health Certificate is a 12-page document that must be completed and certified by an Official Veterinarian (OV) who has completed additional animal export training, and who has been approved by the UK Government for this purpose. The certificate takes considerable time to complete and accuracy is important. You will need to provide supporting evidence for completion of the document:

  • A record of the date of microchipping
  • Rabies vaccination records
  • Evidence of your journey, showing that you are either travelling with your pet, or within 5 days of your pet.
  • Sign a declaration at the certification appointment that the movement of the pets is for non-commercial reasons.

We have a number of OVs available across our practices that can help you with your pet travel needs so please check that one is available when you need to travel by booking well in advance of your travel date. To assist with this process, and to ensure you are fully informed about the documentation you will be required to provide, please complete our online AHC Client Information Form that will be emailed to you when on request of an appointment for an AHC. The completed form should be submitted at least 14 days before your intended date of travel and once reviewed by our official veterinarian, we will call to confirm your appointment.

The AHC will be valid for:

  • 10 days after the date of issue for entry into the EU or NI
  • onward travel within the EU or NI for 4 months after the date of issue
  • re-entry to GB for 4 months after the date of issue
  • only one trip

If you are travelling with more than 5 pets:

All pets must be over 6 months of age, and must be attending or training for a competition, show or sporting event.

  • Written documentation of the age of the pets, and records of attendance at these events must be provided.

Dogs travelling to Finland, the Republic of Ireland, Northern Ireland, Norway or Malta:

  • Dogs must receive treatment against tapeworm (Echinococcus multilocularis) between 1 to 5 days before arriving in any of these countries.
  • Tapeworm treatment must be entered by the Official Veterinary (OV) on the AHC following treatment or in an EU-issued Pet Passport. In practice, therefore, AHCs to these countries will normally be issued within 1-5 days before arrival at your destination.

Arriving in the EU or Northern Ireland

Pet owners travelling with pets must travel on approved routes and will need to enter through a designated Travellers’ Point of Entry (TPE). You may be required to present the pet’s original AHC along with evidence of your pet’s:

  • microchip
  • rabies vaccination history
  • tapeworm treatment (if required).

Repeat trips to the EU or NI

A new AHC will be required for each trip and a rabies vaccination will need to be up-to-date or, if not, revaccination will be required followed by a 21-day wait before travel.

All Cat, Dogs, and Ferrets travelling to Northern Ireland

An Animal Health Certificate will be required if travelling from Great Britain and dogs will require tapeworm treatment 1-5 days before entry, and this must be certified by a Vet.

NI-based pets and assistance dogs returning to NI from GB can use a NI-issued EU Pet Passport to re-enter NI and will not need an AHC.

NI-based pets and assistance dogs returning to NI from GB can use a NI-issued EU Pet Passport to re-enter NI and will not need an AHC.

Returning to Great Britain

There will be no change to the current health preparations for pets entering Great Britain from 1 January 2021. Pet owners must have one of the following documents when returning to Great Britain from the EU:

  • an EU pet passport (issued in the EU or GB before 1 January 2021), or a pet passport from a Part 1 listed third country
  • the AHC issued in GB used to travel to the EU – which you can use up to 4 months after it was issued
  • a UK pet health certificate (for travel into GB only).

This documentation is not required if entering Great Britain from:

  • Northern Ireland
  • the Channel Islands
  • the Isle of Man
  • the Republic of Ireland.

Check the routes before you travel. Owners must travel using approved routes and their pet’s documents and microchip will be checked when entering Great Britain.

Owners of assistance dogs returning from the EU do not have to travel on approved routes. You must notify the point of entry in advance that you are travelling with an assistance dog to ensure the appropriate checks are done. Owners do not have to travel on an approved route if they travel to Great Britain from:

  • other UK countries
  • the Channel Islands
  • the Isle of Man
  • the Republic of Ireland

Travel home from countries not free from tapeworm (Echinococcus multilocularis)

You will need to take your dog to a vet for approved tapeworm treatment and must do this no less than 24 hours and no more than 120 hours (5 days) before entering Great Britain. This requirement has not changed since 1 January 2021. The treatment must:

  • be approved for use in the country where the treatment is applied
  • contain praziquantel or an equivalent proven to be effective against tapeworm (Echinococcus multilocularis)

Tapeworm treatment of dogs is not required prior to re-entry to Great Britain if travelling directly to the UK from Finland, Republic of Ireland, NI, Norway or Malta.

Health and welfare of your pet abroad

You should consider that if you take your pet abroad it may be exposed to a number of diseases that we do not have in this country e.g., some diseases transmitted by ticks or biting flies, and parasites such as heartworm and tapeworm. The tapeworm treatment given under the pet travel rules is purely to prevent the introduction of those parasites into the UK. However, it is vitally important that your pet is protected against these other diseases while abroad. In addition to routine vaccination and normal flea and worm control, the following need to be considered and preventive treatment given. You may find further information regarding the risks and recommended preventive measure measures for the region you are travelling in by checking the European Travelling Pets Advice website.

Leishmaniasis

Caused by an organism that is spread between animals by sandflies. Affected animals may lose weight, develop skin lesions and swollen lymph nodes, become lame, and have recurring fevers. A vaccine is available against Leishmaniasis. This should be planned well in advance of travel. Sandfly repellants are also available from your veterinary practice.

Babesiosis

A parasitic disease of red blood cells is spread by ticks. Signs of disease may include fever, loss of appetite, the
passage of red/brown urine, anaemia, weakness, and death.

Ehrlichiosis

A disease that is also transmitted by ticks and infects red blood cells. Clinical signs vary but include fever, loss of appetite, and anaemia.

Dirofilariasis (Heartworm Disease)

Is transmitted by mosquitoes with the development of adult worms which live in the heart and blood vessels. The signs
of the disease include coughing, breathlessness and can lead to death.

Tapeworms

Echinococcus can produce serious disease in humans and so it is important to protect your pet and thereby, yourself and your family. As well as the tapeworm treatment administered by a Veterinary Surgeon before returning to the UK, we recommend using tapeworm treatment every month your pet is in the EU, 1-5 days before returning (which must be given and certified by a Veterinary Surgeon), and then again, 1 month after returning. 

We have seen several cases of some of these diseases, especially Babesiosis and Leishmaniasis in pets that have become infected while abroad. We would therefore recommend that your pet receives regular preventive treatment to protect against the following whilst travelling abroad in:

  • Ticks (protect against Babesia and Ehrlichia infection)
  • Heartworm
  • Tapeworm
  • Sandflies and mosquitoes (protect against Leishmania and Heartworm infection).

Your local Goddard vet will be able to advise you on the best protective treatments to use depending on the area that you intend to travel to. We wish you a safe and enjoyable journey with your pet.